The hook grip is the way weightlifters hold the bar: thumb flat along the bar, first two fingers wrapped over the top of it. Every snatch and clean you will ever see at a competition is pulled with it. It is also, for the first fortnight, genuinely painful, which is why so many people try it once and quietly go back to a normal grip.
The first time I tried it, it hurt. A lot. After a teething phase of a week or two doing nothing but bar work, the pain went and my pulls changed completely. This is everything I wish someone had told me at the start: what it is, why it works, how to do it properly, how to get through the sore bit, and the times you should not be using it at all.
What the hook grip actually is

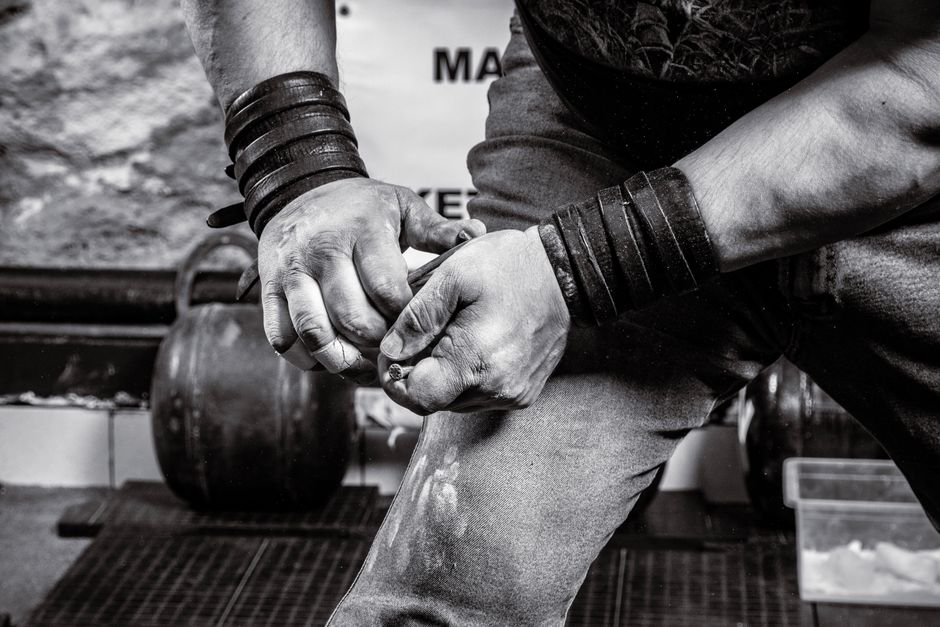
With a normal grip your thumb wraps over your fingers. With a hook grip it is the other way round. You lay your thumb along the bar first, then close your fingers over the thumb, so the thumb is pinned between the bar and your index and middle fingers.
That is the whole trick. The thumb becomes a hook that the fingers lock shut, and the bar cannot roll out of your hand the way it does when the thumb is on top doing nothing useful.
Why weightlifters use it
Two reasons, and the second one is the one people miss.
The obvious one is security. In the second pull of a snatch or clean the hip drive puts a sudden burst of speed into the bar, and a normal grip lets it slip. With a hook grip that problem more or less disappears.
The less obvious one is that it lets your arms relax. Because the hook is doing the holding, you are not squeezing the bar with your forearms through the first pull. Loose arms transmit the drive from the hips into the bar; tense arms absorb it. A lot of lifters find their second pull improves the week they switch to the hook, and it is not because their thumbs got stronger.
How to hook grip, step by step
- Set your grip width first. Find your snatch or clean width as normal. The hook does not change where your hands go, only what the thumb does.
- Lay the thumb along the bar. Put the bar in the crease where your fingers meet your palm, then bend the thumb so it lies flat along the bar, pointing towards your other hand. Think of an L shape, not a thumb pointing down at the floor.
- Wrap the fingers over the thumb. Close your index and middle finger over the top of the thumb, so the thumb is pinned against the bar. Most lifters use two fingers. If you have big hands or a thin bar you may get three over; use whatever locks the thumb without forcing it.
- Get the thumb deep enough. The fingers should cover the thumb from around the knuckle to the nail, not just the very tip. A shallow hook pinches the nail and does nothing for security.
- Then stop squeezing. This is the bit that takes practice. Once the hook is set, let the arms hang. The bar is not going anywhere. If your forearms are burning after a set of pulls, you are gripping on top of the hook instead of letting it work.
It will feel wrong for the first few sessions. Your hands will want to revert to a normal grip the moment the bar gets heavy, and you have to keep re-setting it. That passes.
The painful bit, and how long it lasts
Your thumbs are being crushed between a steel bar and your fingers with the whole weight of the bar behind it, so yes, it hurts. The good news is it is temporary. For most people it is one to two weeks of discomfort, longer if you only train a couple of times a week, and then the skin toughens and the joint stops complaining. Mine did, and I do not remember it ever coming back.
What helps while you get through it:
- Do the teething phase with an empty bar or light weight. Every warm-up, every pull, every deadlift from the floor, hook it. Do not try to switch on a heavy day.
- Chalk your hands, thumbs included. A dry thumb slides into place; a sweaty one gets pinched.
- Tape your thumbs. More on this below. It takes the sting out of the skin, which is most of the early pain.
- Do not give up in week one. Almost everyone who says the hook grip “isn’t for them” tried it for three sessions.
Taping your thumbs
Thumb tape is the one bit of kit worth buying for this. You want a thin, stretchy tape you can tear by hand, not rigid zinc oxide, which stops the thumb bending. Tear a strip about the length of your thumb, start at the base of the thumb and wrap towards the tip, overlapping by half each turn, and stop below the nail so you can still feel the bar. One layer is enough. If it goes white at the tip you have wrapped it too tight.
Plenty of lifters tape every session for years; it is not a beginner’s crutch. The tape I would point you at is the SPORTTAPE thumb tape: it tears cleanly, it stretches, and the adhesive holds through chalk and sweat.
Thin, stretchy and tears by hand, so you can re-tape between sets without hunting for scissors. Takes the sting out of the first fortnight of hook gripping, and plenty of lifters keep taping for years.
Check price on AmazonHook grip vs natural grip

The natural grip, thumb over fingers, is how everyone picks up a bar before they are taught otherwise. It is comfortable, it is easy, and it is fine for anything where the bar is not trying to leave your hands. Where it fails is pulling from the floor or the hang: as soon as the hips fire, the bar rolls towards the fingertips and you end up squeezing to keep it, which is exactly the tension you were trying to avoid.
So the split is simple. Anything you pull, hook it. Anything you hold overhead, squat with, or lift in straps, use a natural grip. Straps and a hook grip do the same job, so you never need both at once; straps are for the days you want to spare your thumbs on high-volume pulls.
When not to hook grip
- The jerk, and anything overhead. There is no pull, so there is nothing for the hook to do, and it stops you getting the bar settled in the palm for a solid overhead position. Rack the bar with a normal grip.
- Squats. Same reason. Thumb over or thumbless, whatever you find comfortable.
- Once the bar has turned over in the clean. Most lifters release the hook as the elbows come through into the rack, so the hands can open and the bar can sit on the shoulders. Keeping it hooked in the rack position is hard on the wrists and not necessary.
- In the snatch, it is personal. Some lifters release the hook as the bar turns over and catch with a normal grip; others keep it hooked all the way overhead. Try both. Neither is wrong, and your coach may have a view.
- With straps. Redundant, and it will make your thumbs sore for nothing.
Hook grip for deadlifts
Plenty of people arrive at this page from the powerlifting side, so: yes, it works for deadlifts, and a lot of strong pullers use it instead of a mixed grip because it is symmetrical and there is no bicep hanging out in front of the bar. Two caveats. The loads are heavier and you hold the bar for longer than in a snatch, so the adaptation period is longer and taping matters more. And it will feel worse before it feels better than it does for the Olympic lifts, because there is no moment where the bar is moving fast enough to feel light. Build it up over weeks, not days.
Common mistakes
- Thumb pointing down the bar instead of along it. The thumb should lie flat along the bar, not curl underneath it. If it is underneath, the fingers cannot pin it.
- Squeezing anyway. The hook is there so you do not have to. If you are still death-gripping, you get the pain of the hook and none of the benefit.
- Only hooking the heavy sets. Your thumbs adapt on the light sets. Hook everything from the empty bar up.
- Too shallow. Fingers over the nail only. Get them over the knuckle.
- Quitting in week one. The complaint I hear most, and the fix is simply week two.
Where it fits
Get the hook grip in place before you spend much time on the lifts themselves, because everything in the pull assumes it. Then read how to learn the snatch and how to learn the clean, and when your hands start to complain about the volume, here is how to deal with calluses. Good luck with the thumbs. It really does stop hurting.
As an Amazon Associate, Lifting Times earns from qualifying purchases. Some gear links are affiliate links, at no extra cost to you. Learn more.